Friday 18 December 2020

Avla Varieties

Amla also known as Indian Gooseberries as we all know is a treasure house of Vit C and daily consumption of Amla is very much recommended in the times of today's Corona Pandemic . 

In winters this fruit is seen everywhere in the markets and so I planned to get it in bulk and made few different varieties in small quantities so that we can have the variations without getting bored . 

As I had already made Moravla last month I decided to give it a skip and fianlly made Amla Chhunda , Amla Candy , Amla murabba , Amla barfi  and Amle ki launji 

For all the recipes wash the avlas thoroughly with water and then steam them in a pressure cooker for 2 to 3 whistles . 


Amla Chhunda 

Ingredients 

15 - 20 steam cooked avla 
half tsp clove and cinnamon powder 
1 tsp - red chilly powder 
1 n half cup - sugar 
1 tsp salt 


Method 

Remove the seeds from steamed avla . 
 
Mix the seedless avla pieces with all the above ingredients . 

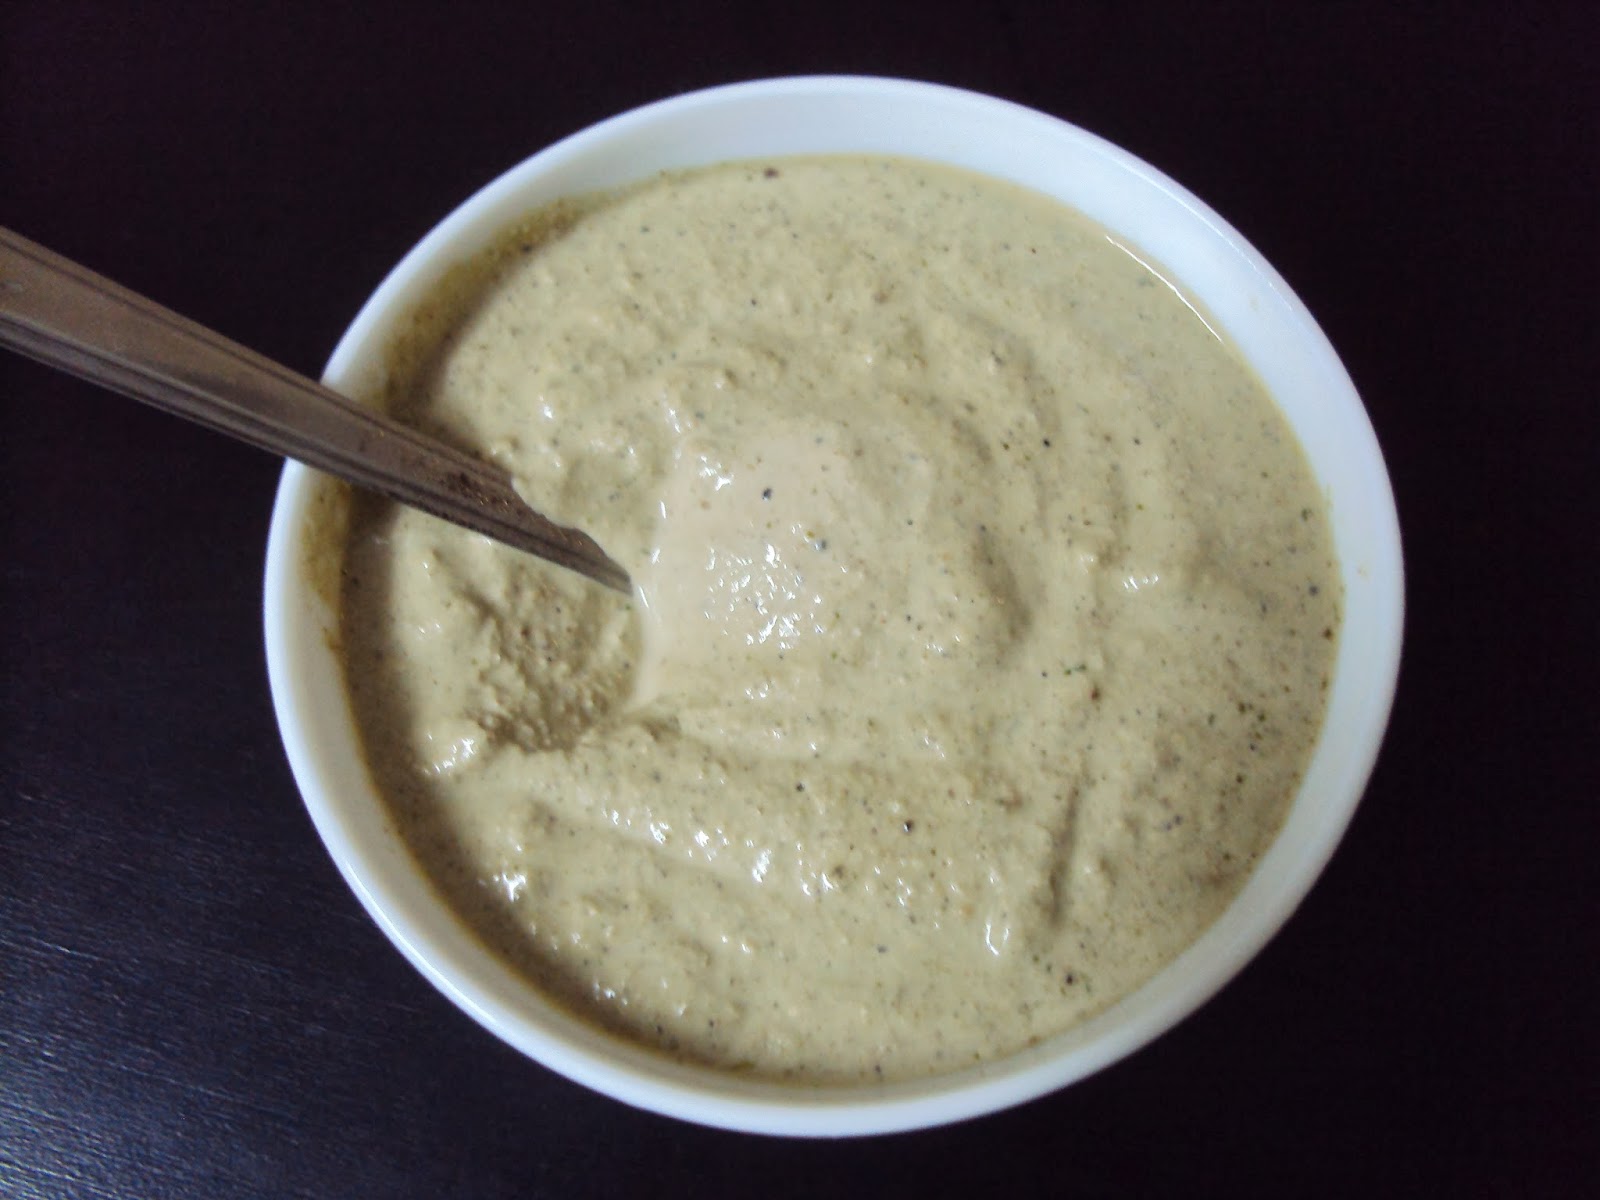
Grind this in a mixer . 

Fill this paste in a dry glass bottle and close the lid tightly . 

Keep the glass bottle in direct sunlight daily for 1 week . 

After a week the chhunda is ready to eat . 


Amla Candy 

Ingredients 

15 - 20 steam cooked avla 
3 cup - sugar 
1/2 cup - water 
1/2 tsp - cardamom powder 


Method 

Remove the seeds from steamed avla . 

Separate the pieces and keep them aside to cool . 

In a pan add sugar and water and bring it to boil . 

When you get a 2 string consistency add the cooled avla pieces and cardamom powder . 

The syrup will again become thin because of the avla juice . 

Keep the glass flame medium and keep on stirring occasionally . 

After about 15-20 minutes syrup again starts thickening .  

Switch off the gas and let the avlas be soaked in the syrup overnight . 

Next day drain out the syrup completely and remove the pieces on a glass plate. 
  
This syrup too has a very good taste and can be consumed like honey . 

Place the glass plate with avla pieces in direct sunlight for 1 week . 

The pieces will gradually become dry and the avla candy will be ready for use . 


Amla Murabba 

Ingredients 

15 - 20 steam cooked avla 
1 n half cup - sugar 
1 tsp cardamom powder 


Method 

Remove the seeds from steamed avla . 
 
Grind the seedless avla pieces in a mixer . 

Add sugar to this pulp and cook it in a non stick pan or a heavy bottom kadhai on a slow to medium flame constantly stirring all the while . 

First the mixture will become thin as sugar melts and then after 10 - 15 minutes it will start thickening . 

Add cardamom powder and keep on stirring till the mixture starts leaving the sides of pan . 

At this stage switch off the gas and let the morabba cool completely . 

When cold it will become thick like a jam . 


Amla Barfi 

Ingredients 

1 cup - steamed seedless avla paste 
2 cup - sugar 
2 tbsp - cornflour 
1 tsp cardamom powder 


Method 

Heat a thick bottomed pan and mix the avla paste and sugar in it . 

Cook this mixture stirring continuously on low to medium flame . 

Add little water to cornflour and add this paste to above mixture . 

Keep on stirring continuously for 5/ 10 more minutes . 

Also add cardamom powder . 

Mixture now becomes shiny and starts leaving sides of the pan . 

At this stage switch off the gas and spread the mixture on a greased tray . 

Let the mixture cool completely and then cut in desired shapes . 


Amle ki launji - Sweet and sour pickle 

Ingredients 

10 - steam cooked avla 
1 n half cup - jaggery
2 tsp - ghee 
1tsp - paanch poran masala ( mixture of methi , mustard , kalounji , cumin & fennel seeds ) 
1/4 tsp - asefoetida pd 
1 tsp - red chilly pd
1 tsp - cumin pd 
1/2 tsp - garam masala 
1 tsp salt 


Method 

Remove the seeds from steamed avla . 
 
Heat ghee in a pan and add paanch poran masala to it . 

When the seeds temper add asefoetida pd . 

Add the seedless avla pieces and stir nicely . 

Now add cut jaggery and cook on low flame . 

The avla pieces will start leaving juice and jaggery will melt in it . 

Add all masala powders and salt and cook for 10/15 minutes 

The mixture will slowly thicken and avla pieces become shiny and semi transparent . 

Switch off the gas at this stage and let the launji cool down completely . 

Store it in a dry glass jar with a lid . 

Don't thicken the mixture very much as after cooling the launji will become thick . 

This launji stays good for almost a month in normal temperature and 2 /3 months in a fridge . 


Tuesday 8 December 2020

Kerela Fish Curry ( Seer Fish )


Made this heavenly delicious kerela fish curry . 

I used seer fish but even pomfret can be used for the preparation of this curry . 

Though traditionally no coconut is used in this curry I added some thick coconut milk as  coconut gives a divine flavour and thicker consistency to fish curries . 

I also used my special Karwari sambar masala ( not the south indian sambar ) as I am used to having it in all our fish preparations . 

The taste was superb but of course it can be completely omitted .  


Ingredients 

8-10 pieces of pomfret or seer fish ( properly washed n cleaned ) 

2 onions - thinly sliced

2 tbsp - grated ginger garlic 

2 tbsp - very finely chopped curry leaves 

half cup - thick coconut milk

half tsp - mustard seeds 

1/4 tsp - fenugreek seeds 

2 tsp - dry chilly powder

1 tsp - turmeric powder 

1 tsp - karwari sambar masala 

2 tbsp - kokam agal ( without sugar )

or 

1 tbsp - thick tamarind pulp 

freshly chopped coriander leaves 

2 to 3 tbspn - coconut oil 
salt as per taste 


Method 

Heat oil in a flat vessel and add mustard and fenugreek seeds . 

When the crackle add sliced onion and saute till slightly golden in colour . 

Now add grated ginger garlic and chopped curry leaves and saute on medium gas till the raw smell is gone . 

Now in a bowl add red chilly powder , turmeric powder , karwari sambar masala , salt and kokam agal or tamarind pulp and add little water to make a thick paste . 

When dry dry masalas are directly added in the oil sometimes they get burnt . 

Making a paste and adding these masalas enhances their flavour . 

Now add this paste in the vessel and again saute till you get a nice aroma of all the masalas . 

Now adjust water and make the gravy thick or thin as per your liking . 

When the gravy starts boiling add the fish pieces .

Immediately after 2 minutes turn them only once . 

Cook the fish on low flame and move the vessel in a circular motion so that the fish pieces are evenly coated with gravy . 

Do not turn the fish pieces while cooking as they may break as cooked fish becomes very soft . 

In the end add thick coconut milk , cook for just a minute and switch off the gas . 

Garnish with finely chopped coriander leaves and serve the curry hot with plain rice . 


Sunday 22 November 2020

Tandoori Masala ( तंदुरी मसाला )

 Usually we get readymade tandoori masala which is made of dry spices . But I prefer making tandoori masala with ginger garlic and freeze it . This tastes amazing and is really very convenient when is very less time we want something really delicious . This masala comes handy at such times and in just minutes you can make mouth watering kababs , tandoori or tikka with chicken , paneer , mushrooms and the list is just never ending . 


Ingredients

3 tbsp - coriander seeds
1 tbsp - cumin seeds
10/12 - cloves
8/10 - cardamoms
1 1/2 inch - cinammon
half - nutmeg
1 tsp - ajwain
1/2 tsp - pepper
2 inch - ginger ( grated )
15/20 - garlic flakes
2 tbsp - chilly powder


Method

Dry roast all the spices separately in a pan till a nice aroma comes .

While still warm grind in the mixer adding grated ginger , garlic and chilly powder .

Don't add water at all .

Fill the masala in a air tight glass bottle and store in fridge .

This masala can be used for 3/4 months if kept in fridge .


Friday 13 November 2020

Mathari ( मठरी )

Made this lovely savory snack for Diwali this year . Known as Nimki , Namakpare , Mathri and many other names this snack will definitely become a sure shot addition to your Diwali snacks list . 


Ingredients 

3 cups - maida ( all purpose flour )
12 tsp - oil 
3 tsp - ajwain ( can also use cumin or kalounji i.e onion seeds ) 
3 tsp - rice flour 
3 tsp - ghee 
salt according to taste 
oil for frying 


Method 

First in a bowl mix the ghee and rice flour very well and keep aside . 

This paste has to be applied of rolled matharis . 

Now in another vessel take maida and add oil to it . 

Rub the flour well with fingers till it becomes crumbly and when you try to mould it with your fist it holds the shape . 

Now add crushed ajwain , cumin or kalounji and make a dough with cold water . 

The dough should not be very hard or very soft . 

Now make 3 balls of this dough and roll very thin on kitchen platform with a rolling pin . 

Apply little paste on the rolled portion and again make a tight roll . 


Cut this roll into small balls . 


Press each ball and again roll a small puri . 

Again apply the paste on rolled puri . 


Now four fold this puri and prick it with a fork . 

Pricking prevents the puris from puffing up while frying . 

Made all folded puris and keep ready . 

Head oil in the kadhai and deep fry the matharis till crisp and golden . 

When completerly cold store in airtight container . 


Tuesday 27 October 2020

Nimona ( Green Peas vegetable )

Once again the season has come when the markets are full of fresh green veggies , carrots and green peas . This is one of my favourite seasons because you get to see all the lovely colourful vegetables . Green peas karanji ( gujhiya ) , kachories , stir fry , rassa  bhaji are some of my favourites and I usually make it a point to make these dishes in winter season . And to that list now onwards I can add one more North Indian yummy dish called Nimona . You will be surprised as to how simple and easy  it is to make this Nimona and yet it tastes amazingly delicious .  


Ingredients 

2 cups - fresh green peas ( shelled ) 

5 to 6 - green chillies 

8 to 10 - garlic flakes 

half and inch - ginger 

fistful - coriander leaves 

2 tbsp - coriander seeds 

1 tsp - cumin seeds 

1 - tomato 

1 - potato 

5 to 6 - urad daal wadi (called sandge in marathi) or mangode ( optional ) 

 3 - 4 tbsp oil 

salt according to taste 


Method 


It is better to use non stick pan for this as else you will have to use lot of oil . 

Keep 1/4 th green peas aside and grind rest of the peas very coarsely in the mixer . 

Also make a paste of ginger garlic green chillies coriander leaves and cumin and coriander seeds with very less or no water . 

Peel the skin of potato and cut it in cubes . 

Also make vert thin slices of tomato . 

Now in the pan add oil and stir fry potato cubes on medium flame . 

Take out the potatoes when crisp and golden in colour and keep them aside . 

In the same oil add ground paste of ginger garlic and saute till oil starts separating . 

Add to it coarsely ground green peas and saute well . 

Now add 1/4 th green peas kept aside , tomatoes and udid wadi . 

Again saute till oil starts separating . 

Now add salt and just enough water . 

The gravy should be thick . 

Cover with the lid and let everything cook very well . 

In the end add crispy potatoes and cook for just 2/3 more munutes . 

Serve hot with rotis or parathas . 


Saturday 10 October 2020

Strawberry Yogurt Smoothy

Regularly having juices or smoothies in the morning for your breakfast is a very healthy habit .

Yogurt provides you with the much needed probiotic bacteria and strawberries are a good source of Vit - C .
And when combined they are a hit giving you a yummy, delicious drink . 
Moreover it hardly takes few minutes to get this delicious smoothy ready . 


Ingredients :

5 to 6 - fresh ripe strawberries
2 cups - greek yogurt ( can use homemade curd also ) 
2 tbps - sugar ( optional ) 


Method :

Blend everything in a blender .

You can dilute it with little milk if you want.

Serve chilled.

Tuesday 8 September 2020

Bhindi Aloo Sabji ( Lady Finger Vegetable)

 This simple yet delicious sabji is relished by even those who usually don't like bhindi ( Lady finger) . 

Frying bhindi till it is crisp enhances the taste of bhindi and make it more tasty . 


Ingredients - 

1/2 kg - Bhindi ( lady's fingers ) 

2 - potatoes 

2 - onions 

2 - tomatoes 

1 tsp - cumin coriander powder 

1 tsp - chilly powder 

1/2 tsp - garam masala 

1/4 tsp - turmeric powder 

1/2 tsp - mustard seeds

pinch of hing ( asefoetida )

5/6 tbsp - oil 

salt to taste 


Method - 


Wash the bhindi and wipe it with a cloth . 

Spread it on a clean dry towel and let it dry for 10/15 minutes . 

Cut the head and tail part and cut bhindi in long pieces . 

Peel the potatoes and cut them too in long pieces like for french fries . 

Cut tomatoes also in long pieces and slice onions and keep aside . 

In a non stick pan put some oil and saute potatoes till golden n crisp . 

In the same oil fry bhindi till almost crisp . 

Now in the remaining oil splutter mustart seeds and add a pinch of hing . 

Add to it sliced onions and saute till the are soft .

Add tomatoes and stir fry for 5 to 10 minutes . 

Now add fried bhindi and potatoes and all other masalas . 

Add salt as per taste and adjust water as per your liking . 

Cover the pan with lid and cook for 10 minutes . 

Serve this sabji hot with chapatis or daal rice . 


Friday 14 August 2020

Tomato chutney (Bengali style)


This sweet sour and spicy tomato chutney is very easy to make and eqally tasty . 
It goes well with almost anything . 
Rice , khichdi , roti , puries or even bread . 
Just try it and enjoy it . 

Ingredients - 

half kg - tomatoes 
8/10 - dates (seeded & chopped) 
2 tbsp - black currants 
10/12 pieces - aam papad / ambe saath ( dried mango pulp will also do ) 
1 tsp each - mustard seeds , cumin , fenugreek seeds , kalounji , fennel seeds ( this is called paanchphoran )
1 tbsp - chilly powder 
1 & 1/2 cup - jaggery 
2 tbsp - oil 
salt to taste 


Method - 

Cut tomatoes into big pieces . 

Heat oil in a pan and add the paanchphoran masala into it . 

When the seeds splutter add cut tomato pieces and stir well . 

Cover with lid and half cook for 5 minutes . 

Now add black currents , chopped dates and aam papad , chilly powder , jaggery and salt .
 
Mix everything well and add a cup of water .

Cook till mixture starts becoming semi-thick . 

Switch off the gas as when cooled the chutney becomes thick . 

When chutney completely cools down fill it in a glass bottle and store in fridge .

This chutney stays well for almost two months if stored properly . 


Tuesday 4 August 2020

Pav Bhaji ( पाव भाजी )


Ingredients : 

1/4 kg ...................... potatoes ( boiled , peeled n chopped )
1/4 kg ...................... tomatoes ( finely chopped )
1/4 kg ...................... capsicum ( finely chopped )
1 small .....................beetroot ( boiled , peeled n chopped )
2 cups .................... fresh green peas ( shelled n roughly ground )
4   ....................... onions ( chopped finely )
2 tbsp ...................... ginger garlic paste
8/10  .......................dry red chillies
2 tbsp .................... pav bhaji masala
4 to 5 tbsp ........... oil ( amul butter gives an excellent taste )
salt
3 to 4 ladi pav per person for serving


Method :


Soak the dry red chillies in 1/2 cup warm water for half an hour .

Grind the chopped beetroot in a mixer .

Also separately grind the soaked red chillies .

Now heat oil in kadhai and add onions . Saute till transparent and add ginger garlic paste and saute for 5 minutes .

Now put the ground paste of dry chillies and stir for 2 minutes .

Add chopped tomatoes and saute till raw smell evaporates .

Then add capsicum , potatoes , roughly ground peas n beet pulp .

Mix everything properly ,  add salt ,  pav bhaji masala .

Cover the kadhai with a lid and let the bhaji cook .

Keep on stirring in between and mash the bhaji with a masher.


Tips : 

Smear ladi pav with butter on both inside and outside
Heat them on a tawa pressing both the sides .
Serve hot pavbhaji with chopped raw onion , lemon and buttered hot ladi pav .


Monday 20 July 2020

Egg Curry (अंडा करी )

Ingredients :


6 .........................boiled eggs ( remove the shells  and cut in half )
2 ........................onions ( 1 chopped + 1 sliced )
2 .......................tomatoes ( finely chopped )
fistful ..................coriander leaves
2 to 3 tbsp...........fresh grated coconut
5 to 6 ..................garlic cloves
2 to 3 ....................green chillies
1 tsp.......................coriander seeds
1 tsp........................fennel seeds
1/2 tsp...................pepper
1/2tsp....................cumin seeds
2 ............................cloves
1/2 inch..................cinnamon
1 tsp....................chilly powder
1/2 tsp................turmeric powder
4 tbsp...................oil
salt


Method :


Heat a tbsp of oil and add all dry seeds and stir fry for 2 mintues.

Now add  garlic and sliced onions and saute till golden.

Add grated coconut and again stir for 5 minutes.

Grind this along with coriander leaves and green chillies with very little water.

Now in a non stick pan add remaining oil and saute onions till translucent.

Now add chopped tomtoes and cook till oil separates.

Finally add ground masala and all other powder along with salt .

Dilute the gravy with water if needed.

When the gravy starts boiling add boiled egg halves and cook further for 2 mintues.

Let the eggs get properly coated with gravy.

Serve hot with rotis or plain rice.


Monday 6 July 2020

Navalkol palyacha paratha - ( Kholrabi leaves paratha )

Known as Navalkol in hindi and marathi and as Kholrabi in english is a type of turnip . It can be cooked in various ways .
Navalkol sabji tastes very delicious . 
Navalkol slices smeared with selected spices and shallow fried also taste very yummy . 
The leaves of this turnip can also be cooked as sabji . 
But most of the people who don't like leafy vegetables much tend to throw these leaves which are actually very rich in vitamins and minerals . 
So today I tried making parathas of these leaves instead of sabji which turned out very tasty . 
Even kids will enjoy these parathas in their tiffins .


Ingredients - 

2 cups - navalkol leaves ( washed and chopped fine ) 
2 /3 cups - wheat flour 
1 tbsp - ginger chilly paste 
1 tsp - cumin coriander powder 
1tsp - amchur ( dry mango powder ) 
1/2 tsp - turmeric powder 
1 tbsp oil 
salt as per taste . 


Method - 

In a vessel take the chopped leaves . 

Add to it all the masalas , salt and mix well . 

Now add the wheat flour and knead a soft yet firm dough . 

Add water while kneading only if needed as the water in leaves is usually enough for kneading . 

Keep aside for 10 minutes . 

Roll medium sized parathas thick or thin as per your liking . 

Serve hot smeared with ghee and with pickle and curd . 

These parathas can even be gived to kids and adults in tifiin . 


Wednesday 20 May 2020

Raw Mango Preserve ( कैरीचा छुंदा )


English

This is a traditional way of making chundaa.
But if you don't have direct access to sunlight then here 's the easy way out.


Ingredients :

1/2 kg .....................Kairi ( Raw Green Mangoes )
350 gm ..................sugar
1 tbsp.....................red chilly powder
1 tsp.......................cumin powder
1/4 tsp...................cloves powder
1 tsp or more ..........salt


Traditional Method :

Wash the raw mangoes and wipe them dry.

Peel the skin of raw mangoes.

Grate them and discard the seed.

Now mix all the above ingredients in a big glass jar .

Cover the lid of the jar tightly and keep the jar in direct sunlight.

Do this for almost a week .

The preserve will be ready to eat in 10 to 12 days.


Easy Cooking Method :

Grate the raw mangoes as in above traditional method .

Now in  a thick bottom pan add sugar , grated mangoes and all other ingredients .

Keep the vessel on medium flame for just 5 to 10 minutes.

The mixture should become warm but not hot at all.

Switch off the gas and cover the vessel with a muslin cloth and keep.

Again next day repeat the same procedure of heating.

Do this for 3/4 days .

Your chunda will be ready without having to bother about keeping it in sunlight.

Never allow the mixture to become too hot or boil.


मराठी 


छुंदा दोन प्रकारे बनवता येतो .
पारंपरिक पद्धत ज्यात छुंदा उन्हात ठेवून करतात .
पण शहरात अनेक ठिकाणी जागेची कमतरता असल्याने उन्ह नसेल तर एक साधी सोपी पद्दत सुद्धा आहे .


साहित्य :

१/२ किलो -  कैरी
३५० ग्राम - साखर
१ टे स्पू  - लाल तिखट
 १ टी स्पू  - जिरे पावडर
१/४ टी स्पू  - लवंग पावडर
१ टी स्पू - मीठ


पारंपरिक पद्दत : 

कैऱ्या स्वच्छ धुवून कोरड्या पुसून घ्या आणि साल तासून काढा .

तासलेल्या कैऱ्यांचा कीस काढा आणि बाटा फेकून द्या .

वरील इतर सर्व साहित्य कैरीच्या किसात मिक्स करा आणि मिश्रण एका काचेच्या बाटलीत भरा .

बाटलीचे झाकण घट्ट लावून बाटली उन्हात ठेवा .

असे जवळ जवळ ८/१० दिवस रोज करा .

साधारण १० दिवसांनी छुंदा छान मुरेल व खाण्यासाठी तयार होईल .


सोपी पद्धत : 

वरील प्रमाणेच कैरीचा कीस करा .

एका जाड बुडाच्या कढईत साखर , कीस आणि इतर साहित्य घाला .

मिश्रण मध्यम आंचेवर ५/१० मिनिटं शिजवा .

मिश्रणाला उकळी फुटणार नाही याची काळजी घ्या .

असं तीन चार दिवस करा .

उन्हात न ठेवताही छुंदा ह्या सोप्या पद्धतीने करता येतो  .


Tuesday 14 April 2020

Peanut Butter

 There are some healthy things which we need to add in our regular diet and peanut butter is one of them . This delicious spread is very rich in protiens and healthy fat . 

Rather than buying it from outside it can be prepared at home very easily and in minutes . I tried making this spread with whatever ingredients I had readily at home and it turned out even better than store bought variety . 

I made some variations like instead of adding sugar or glucose which is usually done in readymade variety I added honey to it . Also while grinding I kept the texture little grainy which actually tasted much better . 


Ingredients - 

1 cup - peanuts 

2 tbsp - groundnut oil 

2/3 tbsp - honey 

salt as per taste 


Method - 

In a kadhai dry roast the peanuts till they give out a nice aroma and become crisp . 

When still warm remove the skin of the peanuts . 

This step is completely optional .

If you want to keep the skil you can do so . 

I have tried both with skin and without skin . 

Now add the skinned peanuts in the mixer and start the mixer . 

Add salt and gradually go on adding oil and honey little at a time while grinding . 

You can keep the texture grainy of can grind till it becomes fine as per your choice . 

Store is a air tight glass jar . 

It stays well for 2 to 3 weeks even if kept outside . 

Just take care not to use water at all . 


Tuesday 10 March 2020

Kheema Biryani ( खीमा बिर्याणी )


Ingredients for Keema

1/2 kg - mutton kheema
2 tb sp - green chilly , coriander leaves , mint leaves paste
2 tb sp - tandoori masala
2 onions - finely sliced
1 t sp - cumin seeds
2/ 3 - bay leaves
1 tb sp - red chilly pd
1/2 t sp - turmeric pd
3 /4 tb sp - oil
salt according to taste


Method for Kheema

Heat oil in a pan and add bayleaf .

Add cumin seeds and let them splutter.

Add sliced onions and saute till golden in colour .

Now add the green paste and stir fry till the oil separates .

Now wash the kheema properly , drained all the water and add it along with salt , chilli powder , turmeric and tandoori masala .

Mix everything nicely , add little water and cook for 15/20 minutes covering a lid on the pan .


Ingredients for Biryani Rice

2 and 1/2 cup - basmati rice
2/3 bay leaves
1/2 t sp cumin seeds
2/4 cardamoms
2 tb sp sour curd
2/3 tb sp oil
salt according to taste

Garnish

crispy fried onions
fried cashews
chopped coriander leaves


Method for Biryani

Heat oil in a pan and add bayleaves , cumin seeds and cardamom and let them splutter.

Now add washed and drained rice , salt , curd and mix well .

Add 4 cups water and make slightly uncooked rice .

Once done take out and spread the rice in a big plate .

Now in the same pan put a layer of kheema at the bottom .

On this arrange a layer of rice .

Repeat the layer of kheema and rice once more .

On top spread fried onions , cashews and chopped coriander leaves.

Cover the pan tightly with a lid .

Cook for 15/ 20 minutes preferably with a tawa below the pan .

This prevents the biryani from getting burnt at the bottom .

Serve hot with pickle , papad or raita .


Tuesday 25 February 2020

Phodni Rice ( फोडणीचा भात )


Ingredients -  


2 cups....................left over rice
2...........................onion ( chopped)
2..........................green chillies ( slit in two)
1/2 tsp..................mustard seeds
1/2 tsp ..................cumin seeds
3-4 ...................... cloves
5/6 ......................pepper
2........................cardamom
2 .......................cinnamon
1/4 tsp..................hing ( asefoetida )
1/2 tsp................turmeric powder
1/4 tsp ...............chilly powder
1 tsp.................sugar
2 tbsp................oil
salt
1/2 lemon ...............(squeezed to juice ) (optional )
chopped coriander leaves ( for garnish) ( optional )


Method :


Heat oil and add mustard seeds.

After they splutter add hing, cloves , pepper , cardamom , cinnamon , slit chillies and chopped onions and saute till translucent.

Now add separated grains of left over rice.

Add turmeric powder, chilly powder , salt and sugar and mix well.

Cover with lid and cook for 5 minutes.

Add lemon juice and chopped corainader leaves and serve hot.


Sunday 16 February 2020

Balushahi


Ingredients :

2 cups ......................maida
1/2 tsp.......................baking powder
1 pinch......................baking soda
2 tbsp.......................whipped curd
4 tbsp...................... warm ghee
a pinch.....................salt
2 cups ....................sugar
1 cup.....................water
1/2 tsp...................cardamom powder
1 tbsp.....................almond slivers
oil for deep frying


Method :


Mix maida, baking powder, soda, curd and ghee gently with fingers till they resemble bread crumbs.

Now add just enough water and knead a soft but firm dough.

Cover it with wet muslin cloth and keep aside for at least 1 hour.

Make sugar syrup by boiling sugar and water.

When the syrup boils add cardamom powder and boil till it thickens a bit.

Now in a kadhai heat oil .

Make lemon sized balls of the dough and press them to form a pedha shape.

Make a depression in the middle with your thumb.

Deep fry these badushahs in oil on low flame for 10 to 12 minutes.

This will ensure that they become crisp and are cooked properly.

Fry till they are golden brown in colour.

Then drain out the oil with a slotted spoon and drop them in prepared syrup.

Let the badushah absorb syrup for about 5 to 10 minutes.

In the meanwhile fry the next batch of the sweets.

Remove the badushah from syrup and arrange them on the plate for the syrup to dry.

Sprinkle almont slivers on top and when completely cold store them in airtight container.


Tuesday 11 February 2020

Motichur Laddoos ( मोतीचूर लाडू )

Some people make the boondi used for these laddoos at home . But I have used the saltless boondi which is readily available at most of the sweet and farsan shops .
Edible camphor that I have used it totally optional but it lends a heavenly flavour which one should rather not miss . 
Most of the Indians who  have heard or had been lucky enough to eat the boondi laddoos offered as prasadam at Lord Tirupati temple will certainly know what I mean . 


Ingredients - 


1/4 kg - saltless boondi 
half cup - almond and pistachio slivers
2 tbsp - raisins
half tsp - cardamom powder 
one small piece - edible camphor 
2 tbsp - ghee 1 
1/2 cup - sugar 
1 1/2 cup - water 


Method - 


Boil the water and sugar together and make one string syrup . 
The sugar syrup should not be very thick or very thin.
Add to it cardamom powder and camphor . 
Now to this syrup add dry fruits and boondi . 
Mix everything well and cover the vessel with a lid . 
Keep the vessel covered for 10/15 minutes . 
The boondi will absorb all the syrup and become soft . 
When the mixture is still warm smear your hand with ghee and make laddoos . 


Wednesday 29 January 2020

Bhajani Chakli ( भाजणीची चकली )


Ingredients -


2 cups - rice 
1 cup - chana daal 
half cup - moong daal 
half cup - urad daal 
1/4 cup - sesame seeds 
1/4 cup - groundnut oil 
2 tbsp - coriander cumin powder 
1 tbsp - chilly powder 
1/4 tsp - asefoetida 
salt 
oil for frying 


Method - 


In a pan dry roast rice and all three daal varieties separately till they give out a nice aroma . 

While still warm grind rice and daal in a mixer and make a fine powder . 

While grinding add coriander cumin powder , chilly powder , asefoetida and salt .

In a separate vessel boil 3 cups water .

Add sesame seeds and oil to the water while boiling . 

After water boils add the ground flour and mix everything well and switch off the gas . 

Cover the vessel with a lid and keep aside for an hour .

After an hour sprinkle some water and knead a soft dough .

Take the chakli making equipment and smear its inside with oil .

Add this soft dough in equipment and make chaklis on a paper or a plastic .

Deep fry the chaklis till they turn golden brown and crispy .

When completely cold store in air tight bottle . 

Saturday 18 January 2020

Creamy Corn & Capsicum Pan Pizza

Ingredients :

2 cups .........................tomato sauce
1 cup...........................pesto sauce
2 cups..........................creamy corn
2 .................................capsicums cubes and deseeded
6  ...................... pizza bases


For Pesto Sauce :


Grind together coriander leaves, olive oil, melon seeds, pepper powder and salt.


For Creamy corn :


Grind the corn coarsely  for few seconds till they are just crushed.
In a pan put this ground corn, milk , sugar and salt and cook till thick.

Assembling the pizza :

Apply some tomato sauce on the pizza base.
On that spread some pesto sauce.
Now apply a layer of creamy corn and spread capsicum  chunks on it.
Lastly sprinkle grated mozarella cheese and bake in an oven till the cheese melts .

Pan method : 

Heat a flat bottomed pan on a high flame.
When sufficiently hot apply oil on it and keep the pizza in the pan.
Now drizzle some water on the sides and immediately cover the pan with a lid completely.
Keep some weight on it so that the steam doesn't escape.


Lower the flame and cook for 2 to 3 minutes or till the cheese melts.
These pan pizzas are very easy to make and get ready in hardly in any time.


Related Posts Plugin for WordPress, Blogger...